Before..... I was working primarily as a long term artist-in-residence at public schools. I would cart around art supplies in the back of my car and tote everything in an out of all the classrooms I visited. Supply prep would be done at my kitchen table the night before a residency session, and extra supply items were stored in my basement and in various bags littering my living room. I would work with other teachers in their classrooms, dependent on their set-up of space and management of behavior. While I loved making art with the kids in my residencies, there was a lot of inconvenience associated with the life of an itinerant teaching artist.
Now.... I'm starting my first job as an (almost) full time K-5 Art Teacher at a small charter school in South Philadelphia. I have been given the keys to a virtual kingdom (in my eyes), and have my very own space to teach in. It is stocked with supplies I was able to order for the whole year, and there's storage space for it all. I got to determine the furniture layout and make my own rules and consequences for how students should behave in class. Instead of a look of panic upon my arrival on the faces of my colleagues ("what? our residency session is today?!?") I will get looks of relief from my fellow teachers ("oh, thank heavens I have a moment to catch up and hit the restroom!")
So! Welcome to My Blue Art Room! Anyone who knows me knows BLUE is my favorite color, so how wonderful to walk into my cerulean surroundings last week! I had 3 short afternoons last week to start setting up the room. This is what the room looked like BEFORE:
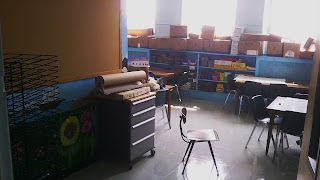 |
my entire supply order was sitting in boxes on the window ledge
and everything was stacked and stored away for summer.
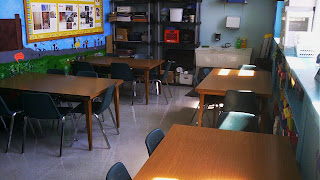
This is actually a picture from after I arranged the tables, as when I first
arrived everything was clumped into the front corner. |
I quickly set about rearranging furniture, unpacking, and reorganizing everything. This was not too difficult, though as the previous art teacher was a wonderfully organized teacher who actually taught me all I know about supply storage, distribution, and classroom management. It's a small L-shaped room, which presents its challenges, but I think I've got it ready to go for the arrival of my students next week. While school started for grades 1-5 on Wednesday, they did not see the Specials this week. Thankfully that gave me plenty of time to REALLY prep the room and materials for them.
So, here's a tour of the new and improved Blue Art Room:
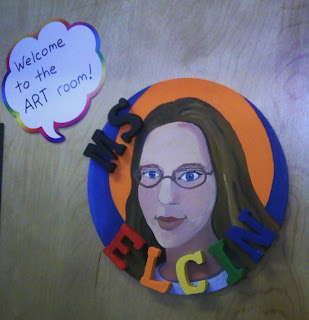 |
I thought a self-portrait would help the students get accustomed to
seeing a new face in the art room this year. |
I had a lot of fun coming up with my door decorations! While setting up the supplies I sorted through the old crayon boxes to get rid of broken ones. Some of them ended up in my crayon mosaic below. The rest are getting recycled into jumbo multi-colored crayons by melting them into an egg-poaching tray.
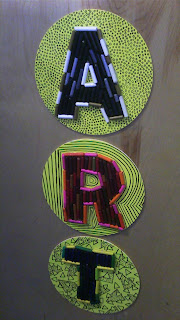 |
This crayon mural gave me grief the first time I tried to hang it.
PS: there's no substitute for 3M command strips! |
When you walk in my door there's so much light from the high south-facing windows! I love it, but we might end up pulling the shades down if the kids think the light is too much on their papers while they work. The entrance area houses my desk, classroom folder flatfile, demo cart, drying rack, and bulletin board to the left, and my filing cabinet, projector cart, and free-activity area to the right. I'm really happy to have this entrance space as it allows plenty of room for lining up to leave, and also allows for a circle area on the floor for reading stories.
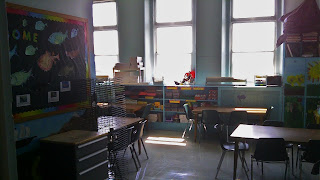 |
The entrance uses one part of the L for certain kinds of activity
The light and high ceilings make the art room feel airy. |
I've arranged my 5 tables to utilize the other part of the L. Luckily my maximum class size this year is 23, so I'm able to have 3 tables of 5 and 2 tables of 4 without feeling too crowded. The back section has 2 utility shelves for miscellaneous paper and all the painting staging areas, the double utility sink, and a small cabinet for all the paint. Above those features are 3 tiers of wire shelving to house materials I don't use on a daily basis. Along the window ledge are more paper shelves, and underneath are construction paper (away from the light), crayons, markers, glue, and colored pencils. All of those supplies are sorted in baskets for each table, and are accessible to my table helpers.
 |
| the view from my board corner. A 5th table is at the front of the room to the left |
I've really enjoyed setting up my bulletin boards and classroom decor. The main board currently has a fish-theme to match our school-wide positive reinforcement system, "Caught in the Act" (of being good). The board also provides some extra opportunities for review questions while lining up.
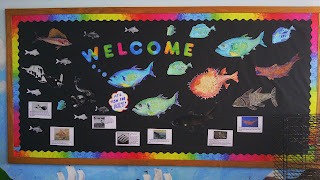 |
I drew my own fish and added in some fish from art history
At the bottom of the board are questions about the artwork
to reinforce the Elements and Principles of Art and Design. |
Here's the view from the sink area towards the front of the room. I have a cabinet filled with office and printmaking supplies at left, shelves for my mini-library and open access to pencils, erasers, scissors, rulers, compasses, and glue sticks; my new whiteboard, a place for exemplars on the blackboard, and my sentence strip holder for vocabulary.
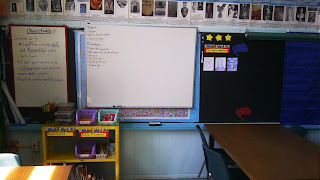 |
There's a whiteboard for posting objectives, and I've written
myself some supply and procedure reminders. |
Some classroom management tricks I'm keeping from the last teacher are weekly table helpers, and a 3-star noise and classroom-wide behavior system.
 |
I've got my first exemplars up too! The whole school is doing
a collaborative self-portrait mural |
A clean, organized, and inviting space is quite important for an art room. Starting off and keeping it cleaned and organized sets the tone for students to help maintain the space. It tells them that it's a safe and orderly place. Having certain materials and tools completely accessible tells them it's a space for them to work and find what they need easily. Having clear visuals around the room makes it easy for students of all language and ability levels follow along. I hope this classroom arrangement will be efficient for me and my students!
We have a long weekend for labor day, and then I see students for the first time on Tuesday!!!!


